Moov
Hurdlr recognizes that payment processing is critical to the business model of many FinTechs. As such, the Hurdlr API allows you to connect your own Moov facilitator account, so that you own the relationship between your customer and Moov, including any associated economic benefits.
1. How it works
Hurdlr's Invoicing API makes it easy for your team to provide invoicing functionality to your users, and your users can collect payments via the payment rails of your choosing. When leveraging Hurdlr's Moov integration, your users will be able to collect payments from their clients via credit card, and your development team will not need to do any Moov-specific development.
2. Getting started
If you haven't already done so, you should create a Moov account for your company/app.
3. Create API keys
The header displayed in your new Moov account dashboard will say "Viewing test account", which indicates that you are currently in Moov’s "Test mode".
On the left-hand navigation pane, you can click "Developers", then click "API Keys". Next, click the "New API key" button on the top right:

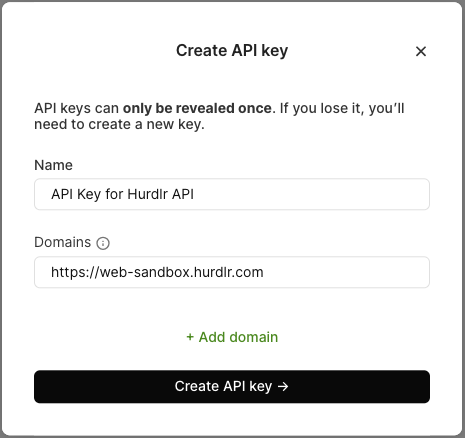
In the "Name" field, you can add any name (e.g. "API Key for Hurdlr API"). Under "Domains", you should add https://web-sandbox.hurdlr.com for “Test mode” and https://web.hurdlr.com if for “Production mode”. Then click "Create API key":

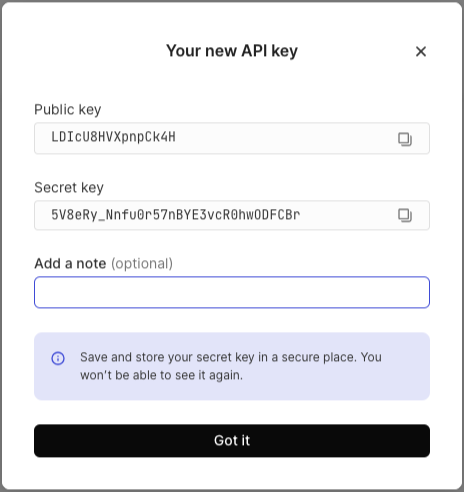
Note down the "Public key" and "Secret key" shown, as they will only be displayed once.
4. Add webhooks
On the left-hand navigation pane, you can click "Developers", then click "Webhooks". Next, click the "New webhook" button on the top right:

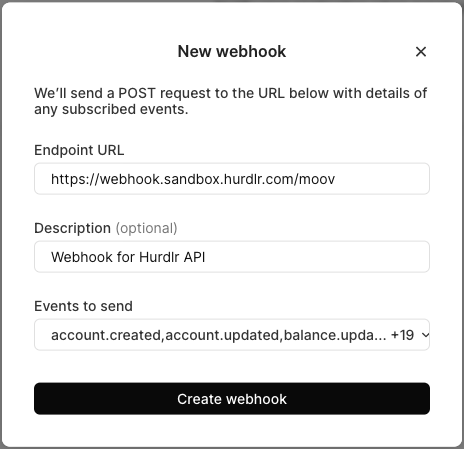
In the "Endpoint URL" field, you should add https://webhook.sandbox.hurdlr.com/moov for “Test mode” and https://webhook.prod.hurdlr.com/moov for “Production mode”. In the "Description" field, you can add any description (e.g. "Webhook for Hurdlr API"). Under "Events to send", you should click "All events". Then click "Create webhook".
5. Get Moov facilitator account id
On the left-hand navigation pane, you can click "Settings", then click "Business details". Note down the "Account ID" shown.
6. Specify your fee schedule
As the facilitator of the payments between your users (merchants) and their clients, you are able to monetize your payment flows by collecting fees on payments to your merchants. These fees should be finalized between you and your Moov point-of-contact (contact us directly at [email protected] if you’d like an introduction to a POC at Moov). Once you’ve finalized your fee structure with Moov, please note down the following:
A. Moov’s base fee for each payment
B. Your additional base fee for each payment (if applicable)
C. Moov’s percentage fee for each payment
D. Your additional percentage fee for each payment (if applicable)
Note: your users will only see the total base fee (A+B) & total percentage fee (C+D)
7. Securely share your Moov information
Contact us directly at [email protected] for instructions on how to securely share:
A. the Moov facilitator "Account ID" that you noted down for Step 5
B. the "Public key" and "Secret key" that you noted down at the end of Step 3
C. the full fee schedule from the end of Step 6
8. Production access
Once the above steps have been completed in “Test mode”, you are ready to switch to “Production mode” and start moving real money.
The first step is to complete your business profile within the Moov dashboard and get approval for production access. Once that is complete, you will need to switch to “Production mode” and repeat steps 3 through 7 above to share your production credentials with Hurdlr.
9. Next steps
It's as simple as that! Now your customers will be able to receive payments via credit card. If you have not already implemented the Hurdlr Invoicing API nor embedded the Invoice Dashboard into your product, that is a great next step.
Updated 4 months ago
